Configure AzureAD as Identity Provider
This configuration is based on the generic OIDC configuration. You can use the Azure AD Template instead.
AzureAD Tenant as Identity Provider for ZITADEL
This guides shows you how to connect an AzureAD Tenant to ZITADEL.
In ZITADEL you can connect an Identity Provider (IdP) like an AzureAD to your instance and provide it as default to all organizations or you can register the IdP to a specific organization only. This can also be done through your customers in a self-service fashion.
Prerequisite
You need to have access to an AzureAD Tenant. If you do not yet have one follow this guide from Microsoft to create one for free.
AzureAD Configuration
Create a new Application
Browse to the App registration menus create dialog to create a new app.
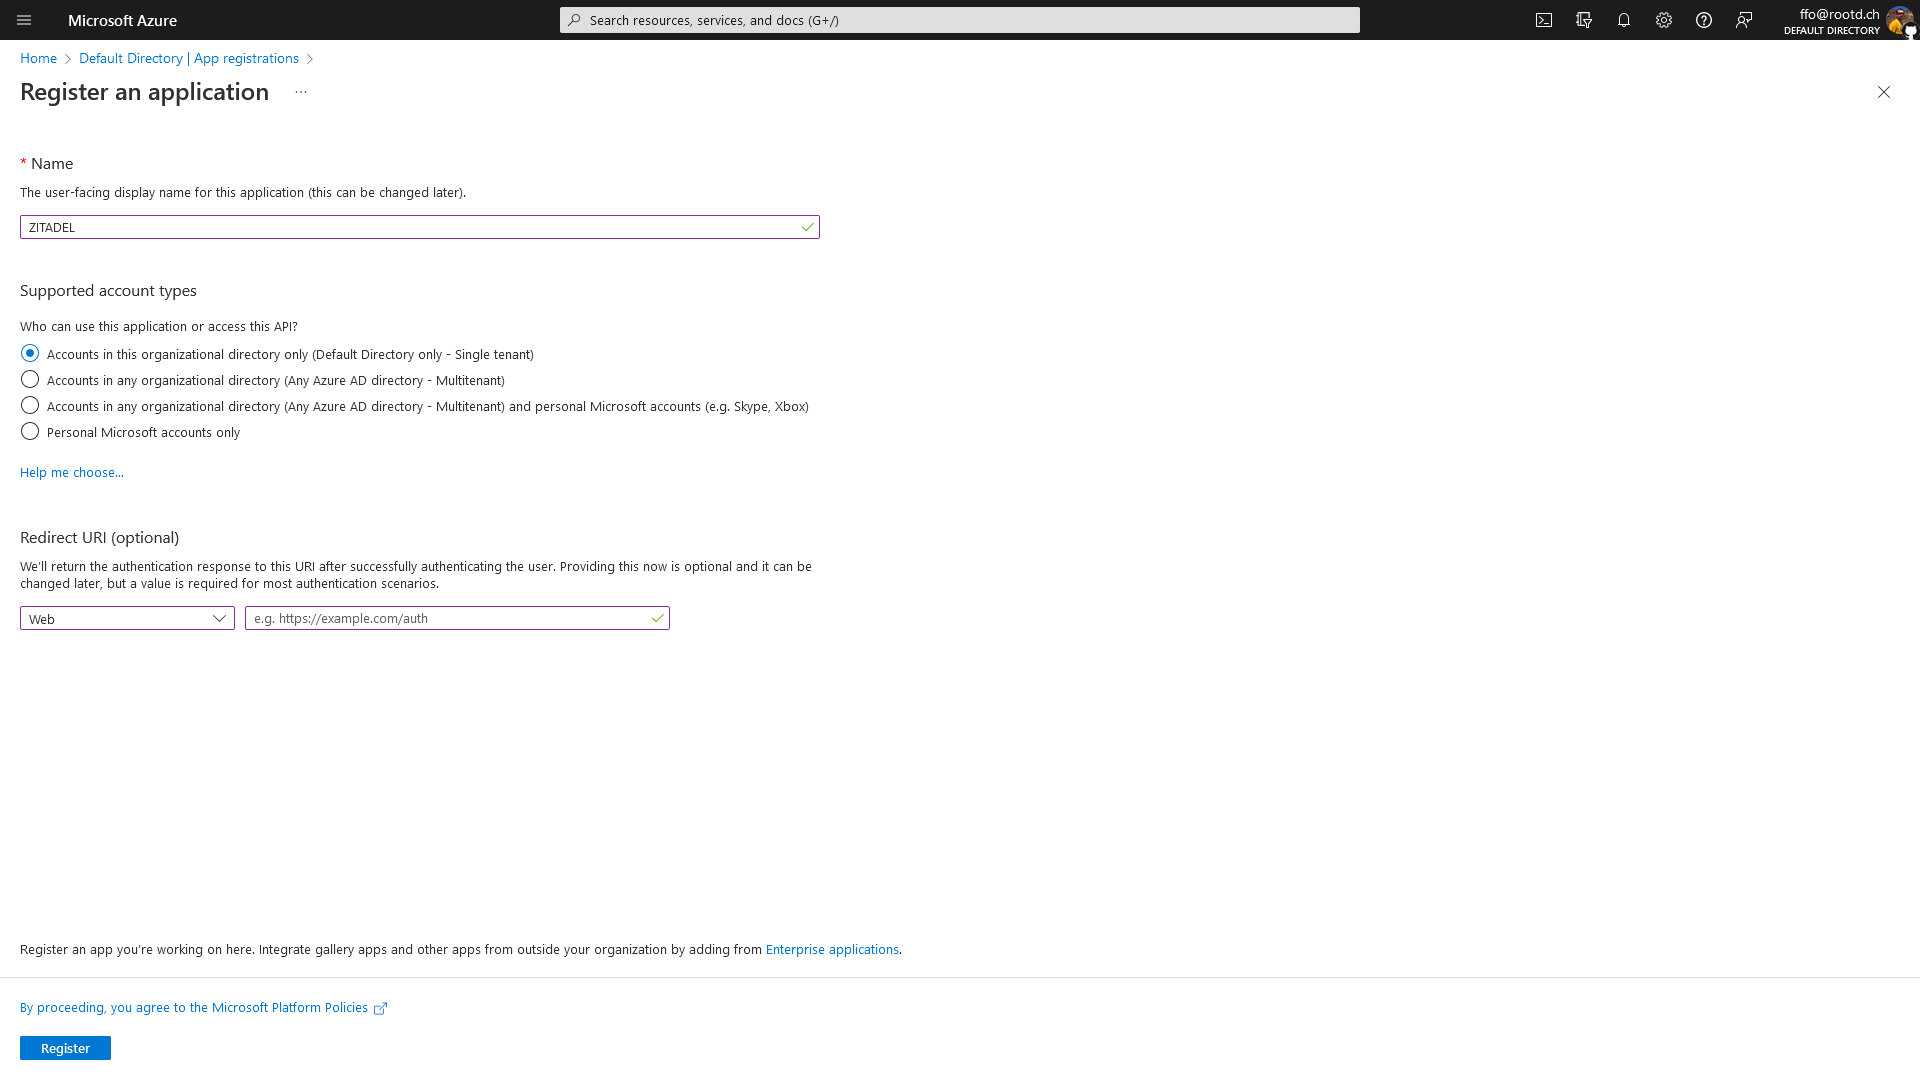
Make sure to select web as application type in the Redirect URI (optional) section.
You can leave the second field empty since we will change this in the next step.

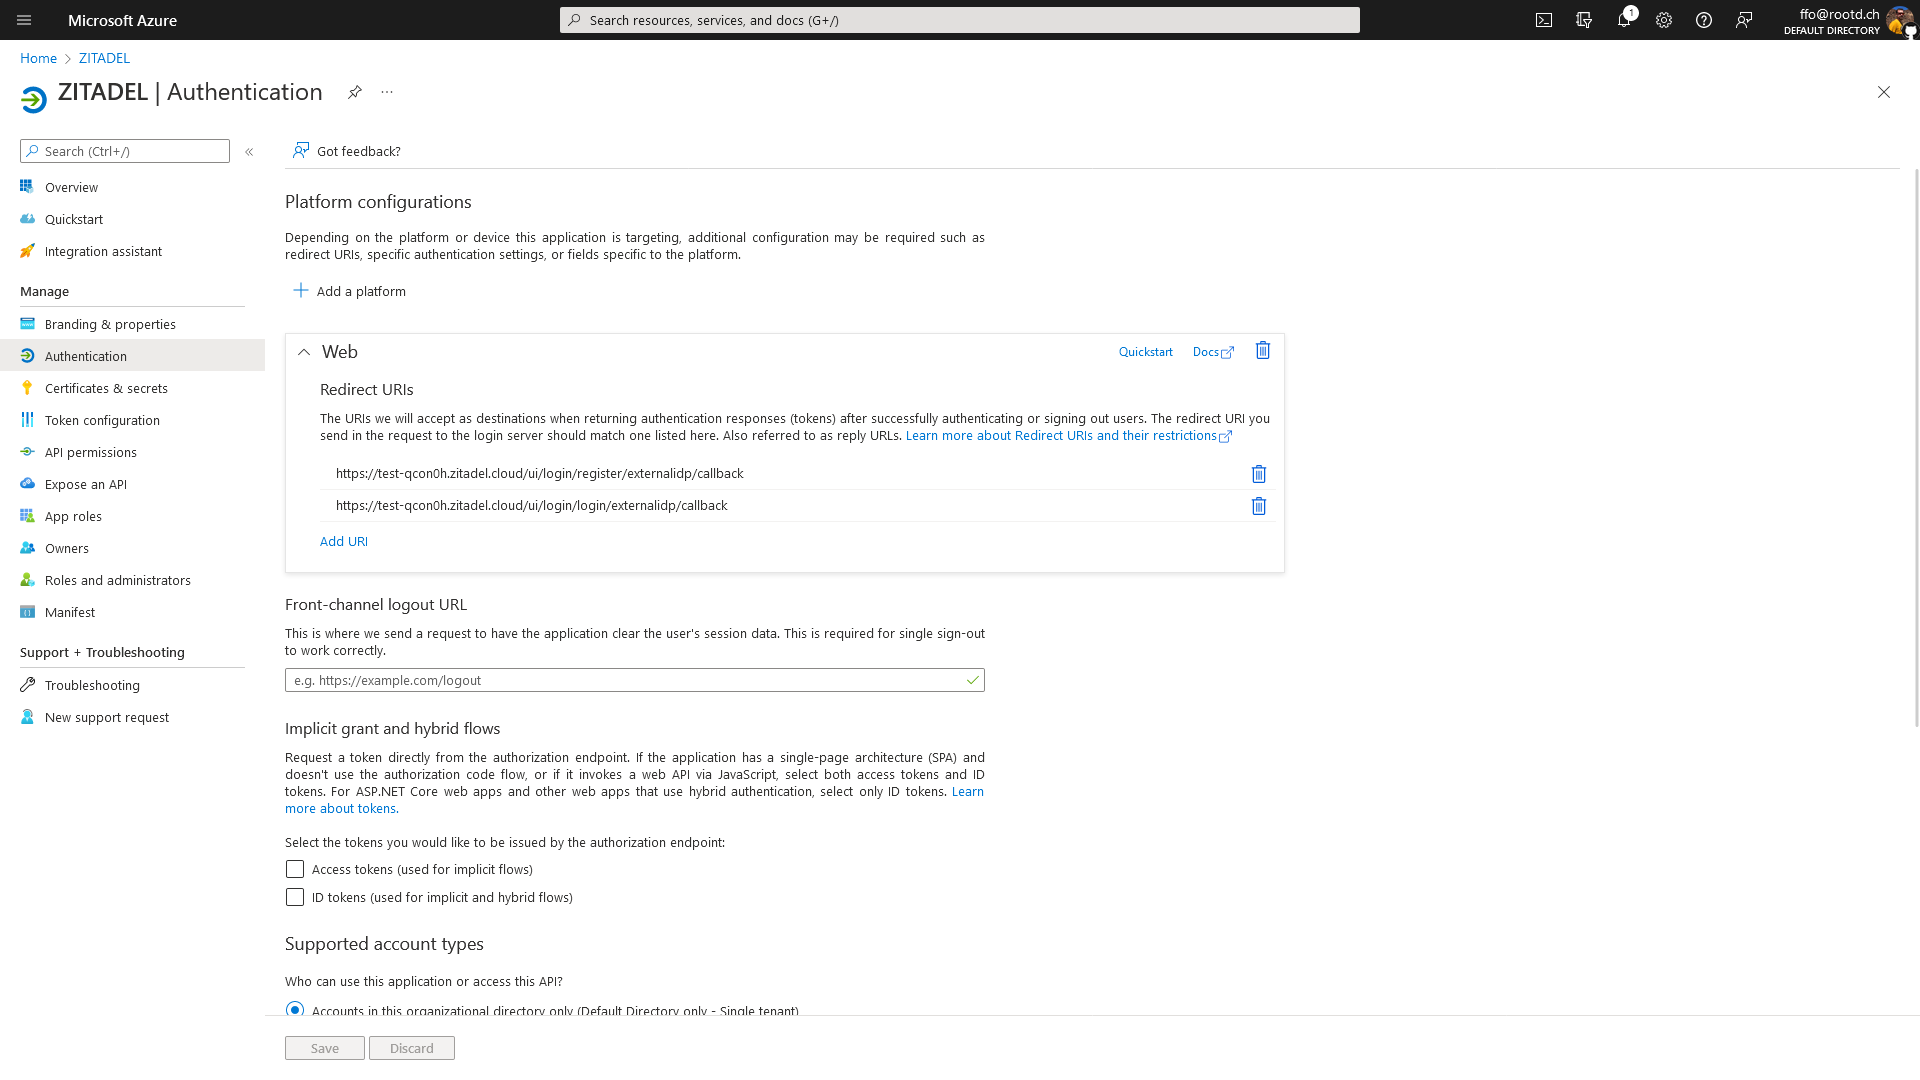
Configure Redirect URIS
For this to work you need to whitelist the redirect URIs from your ZITADEL Instance.
In this example our test instance has the domain test-qcon0h.zitadel.cloud. In this case we need to whitelist these two entries:
https://test-qcon0h.zitadel.cloud/ui/login/login/externalidp/callback
To adapt this for you setup just replace the domain
Create Client Secret
To allow your ZITADEL to communicate with the AzureAD you need to create a Secret
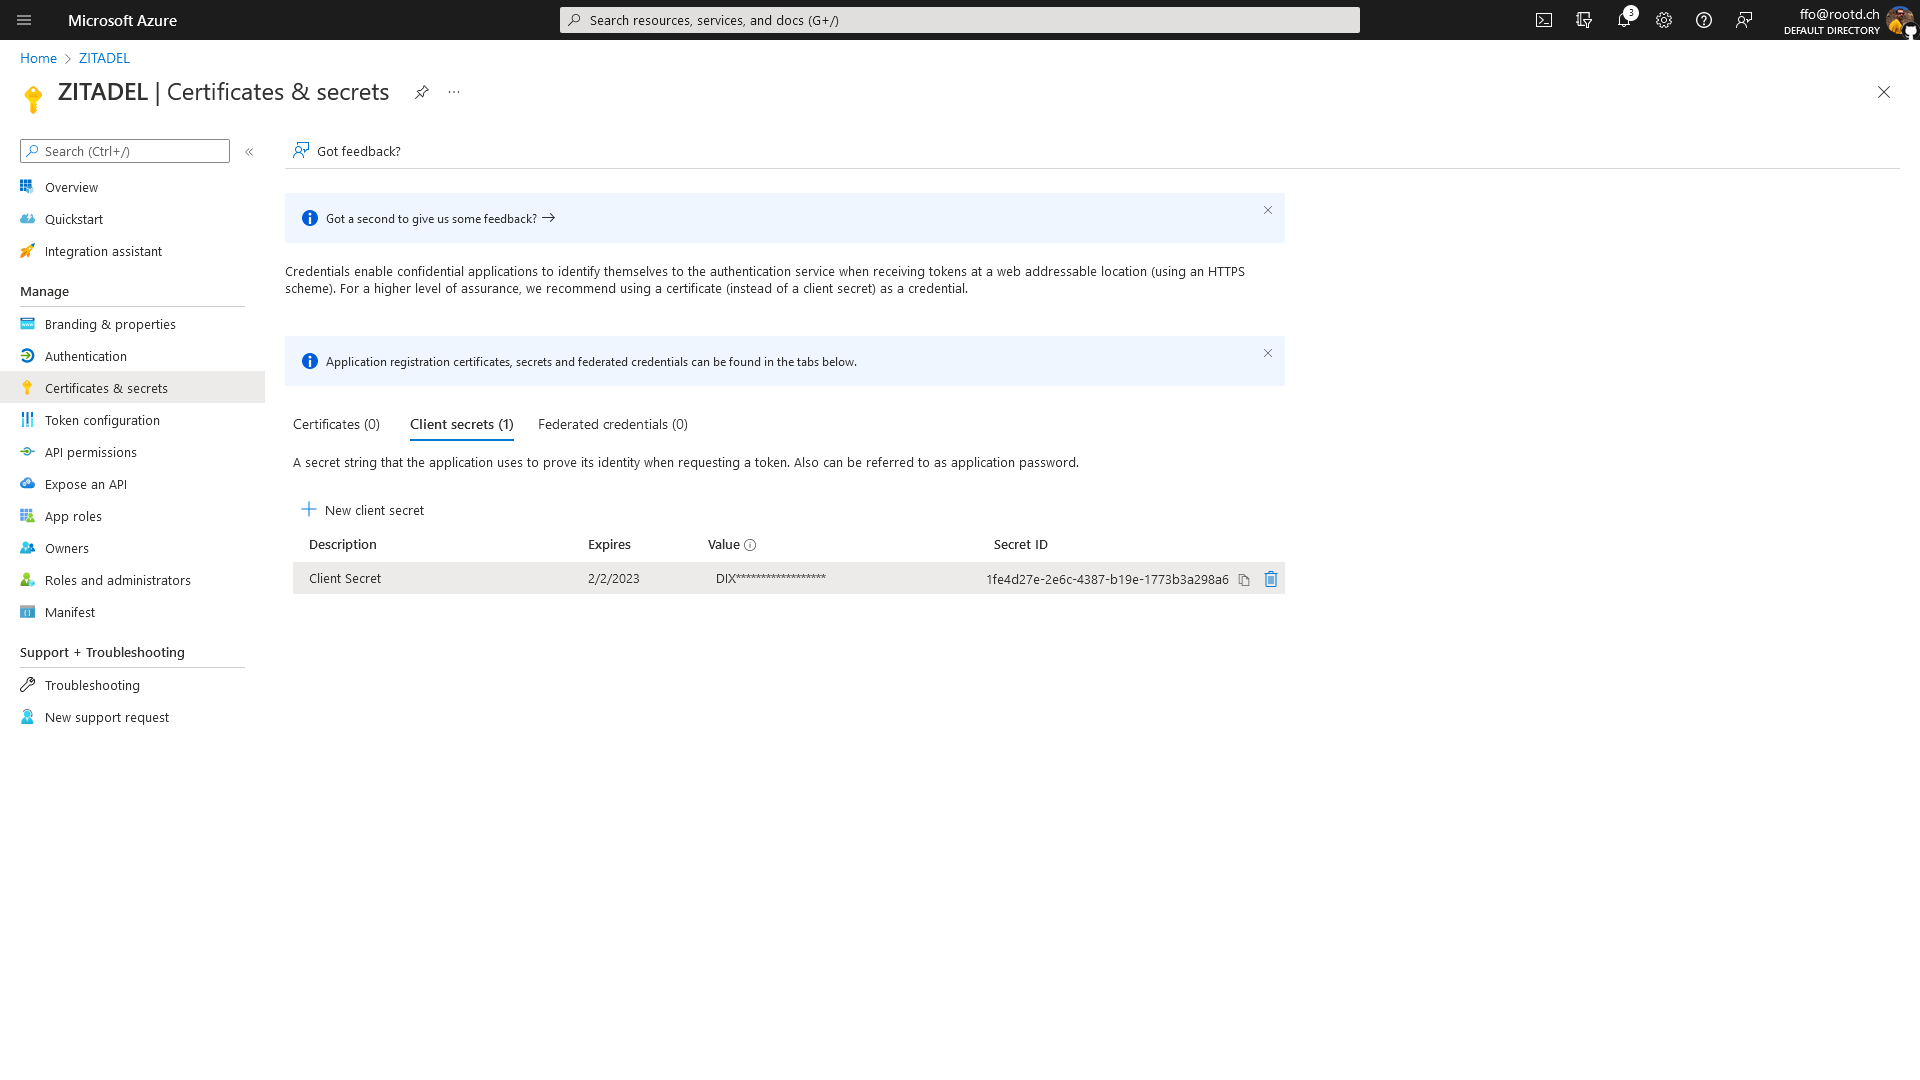
Please save this for the later configuration of ZITADEL
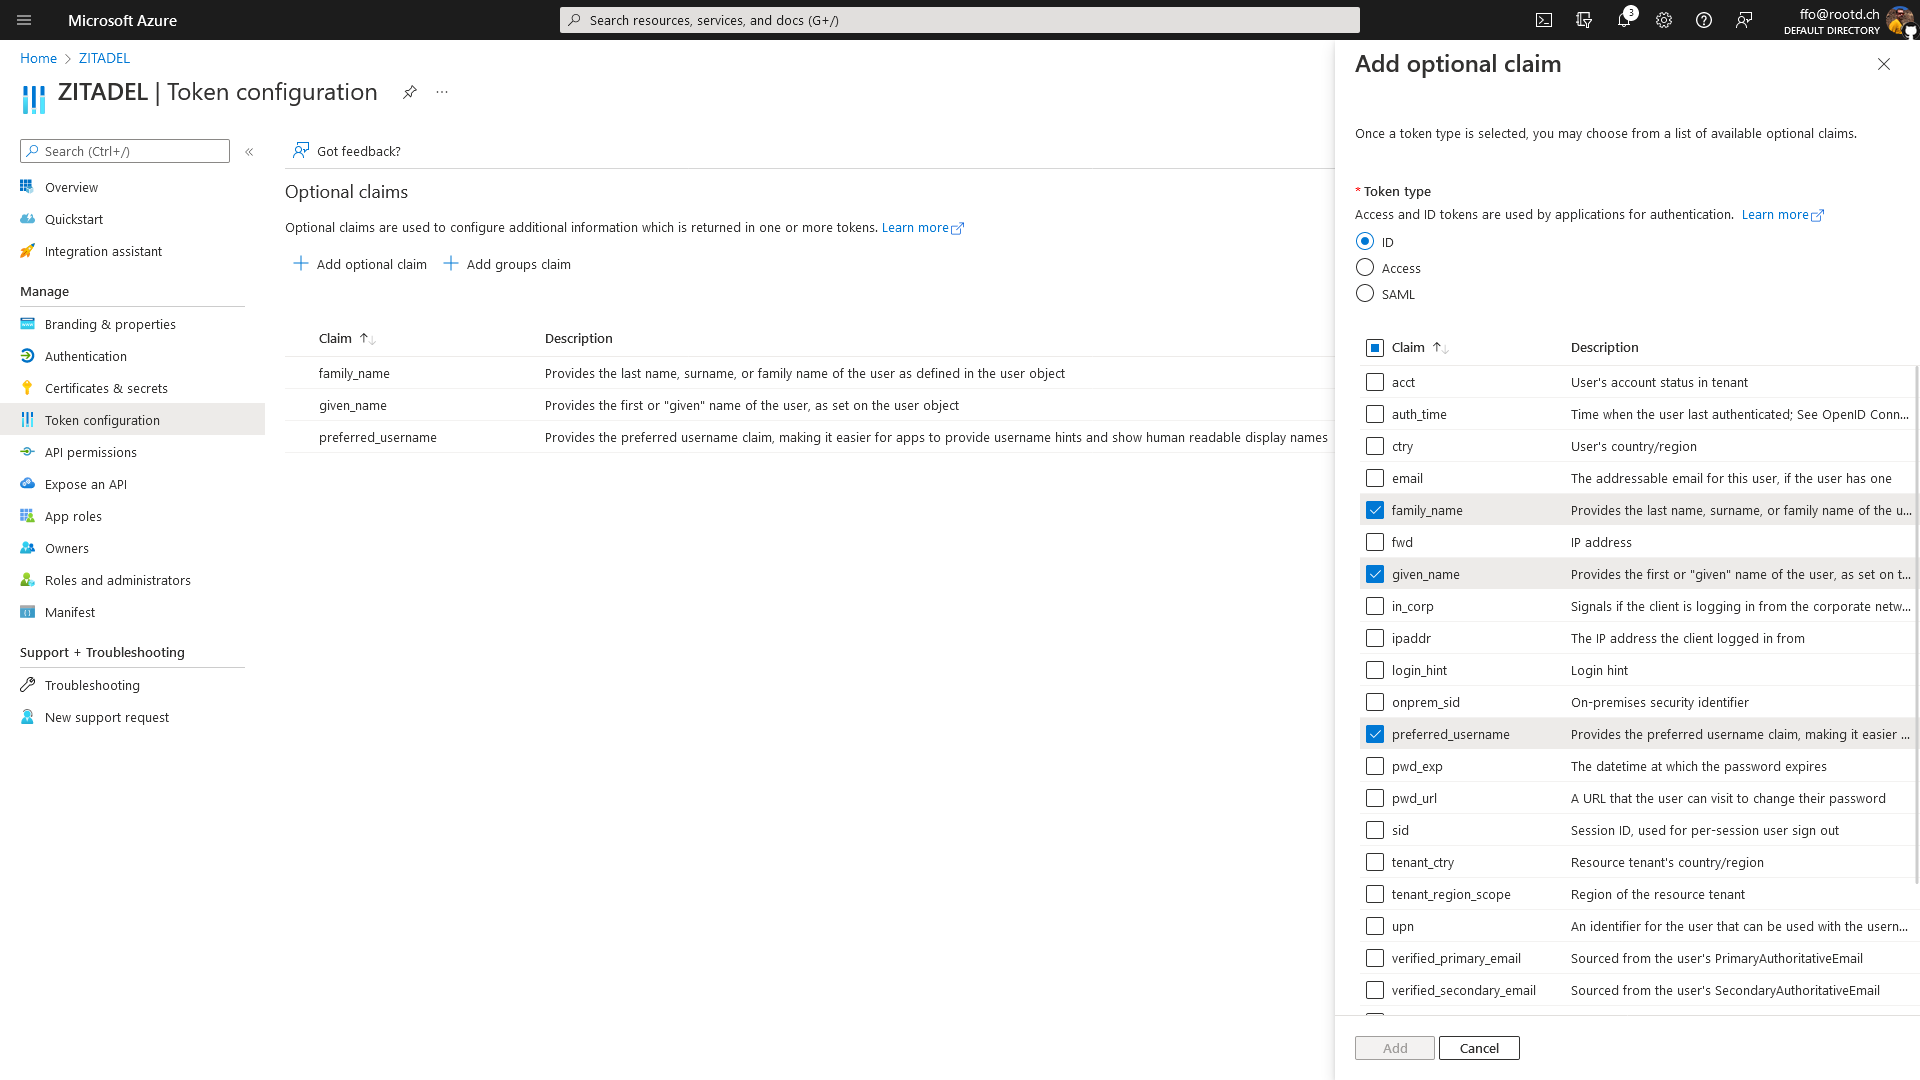
Configure ID Token Claims
ZITADEL Configuration
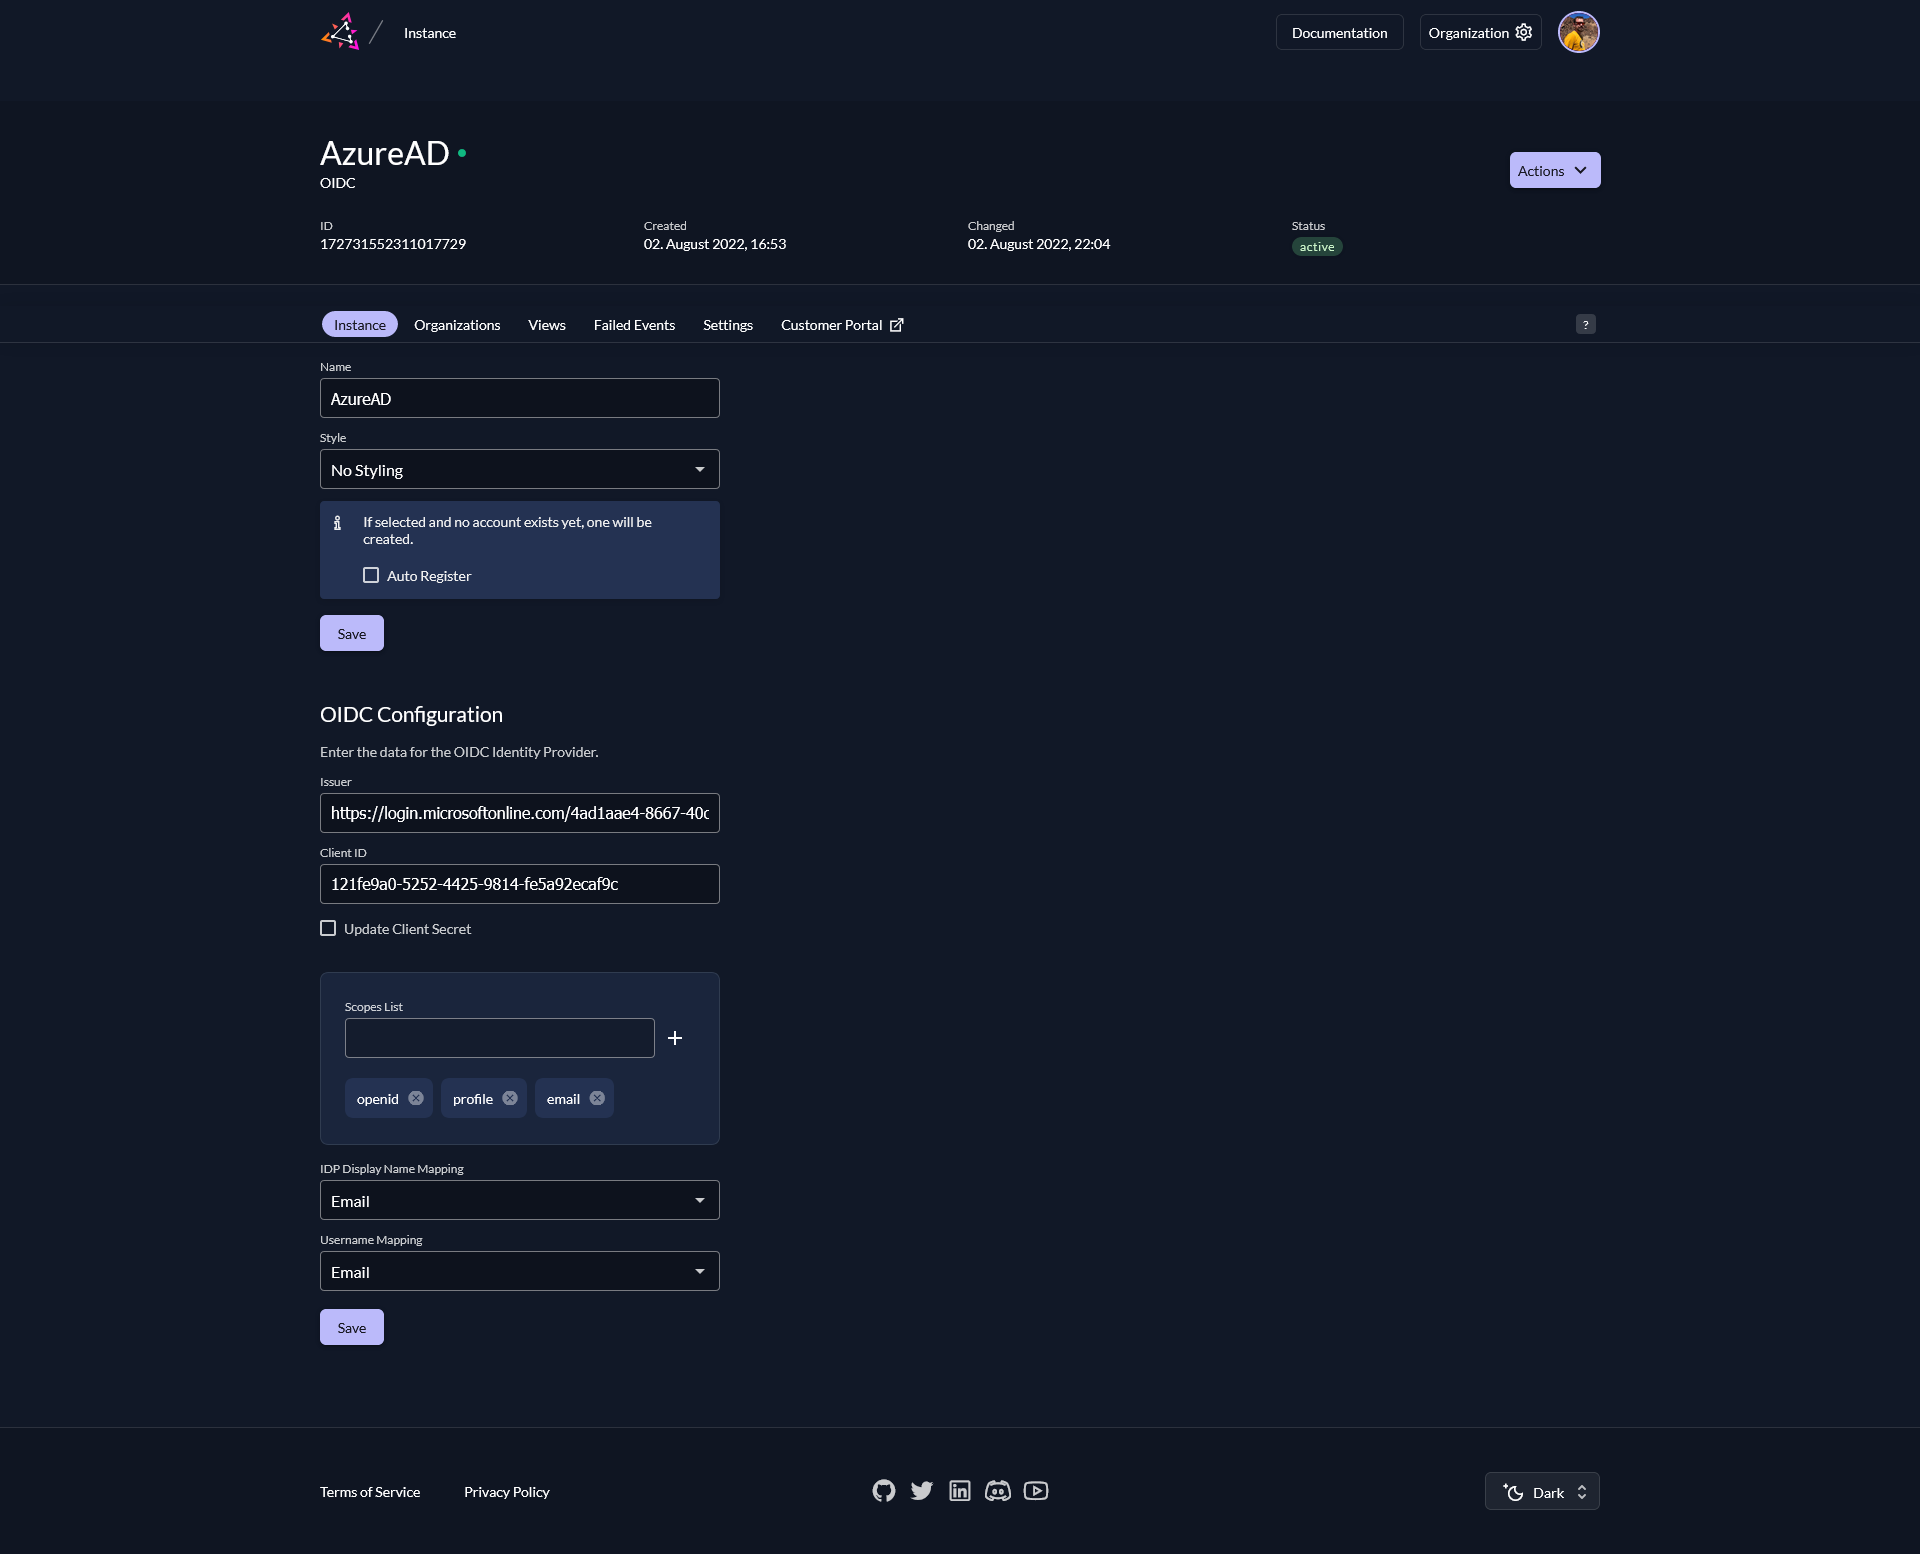
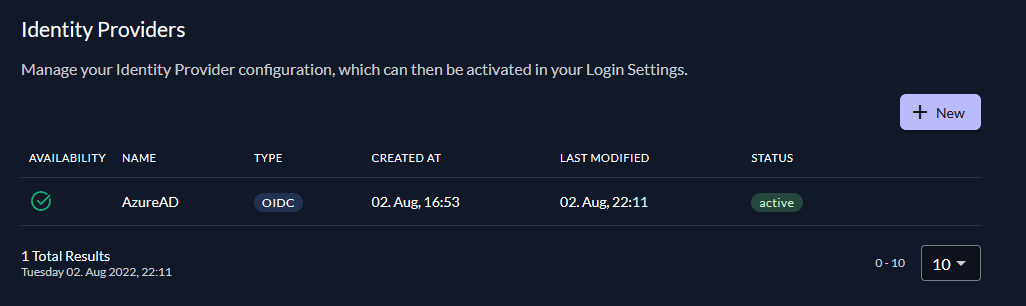
Create IdP
Use the values displayed on the AzureAD Application page in your ZITADEL IdP Settings.
- You need to extract the
issuerof your AzureAD Tenant from the OpenID configuration (OpenID Connect metadata document) in theEndpoints submenu. It should be your tenant's domain appended with/v2.0 - The
Client IDof ZITADEL corresponds to theApplication (client) IDin the Overview page - The
Client Secretwas generated during theCreate Client Secretstep - Add
https://graph.microsoft.com/User.Readto the scopes list to let personal Azure accounts register themselves
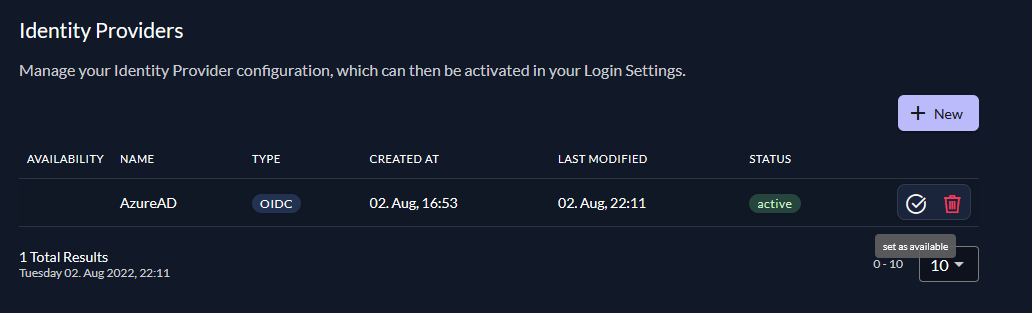
Activate IdP
Once you created the IdP you need to activate it, to make it usable for your users.
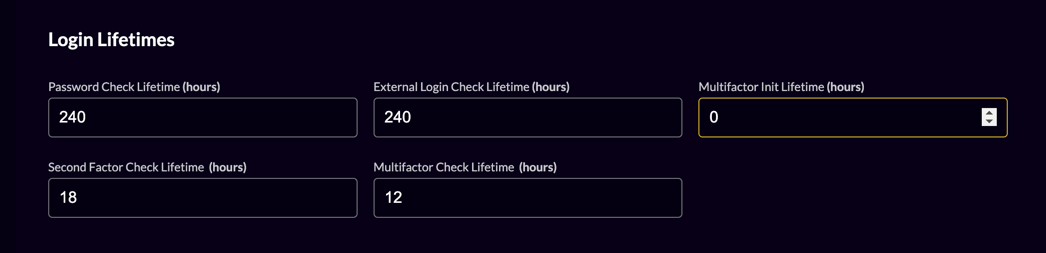
Disable 2-Factor prompt
If a user has no 2-factor configured, ZITADEL does ask on a regularly basis, if the user likes to add a new 2-factor for more security. If you don't want your users to get this prompt when using Azure, you have to disable this feature.
- Go to the login behaviour settings of your instance or organization, depending if you like to disable it for all or just a specific organization respectively
- Set "Multi-factor init lifetimes" to 0
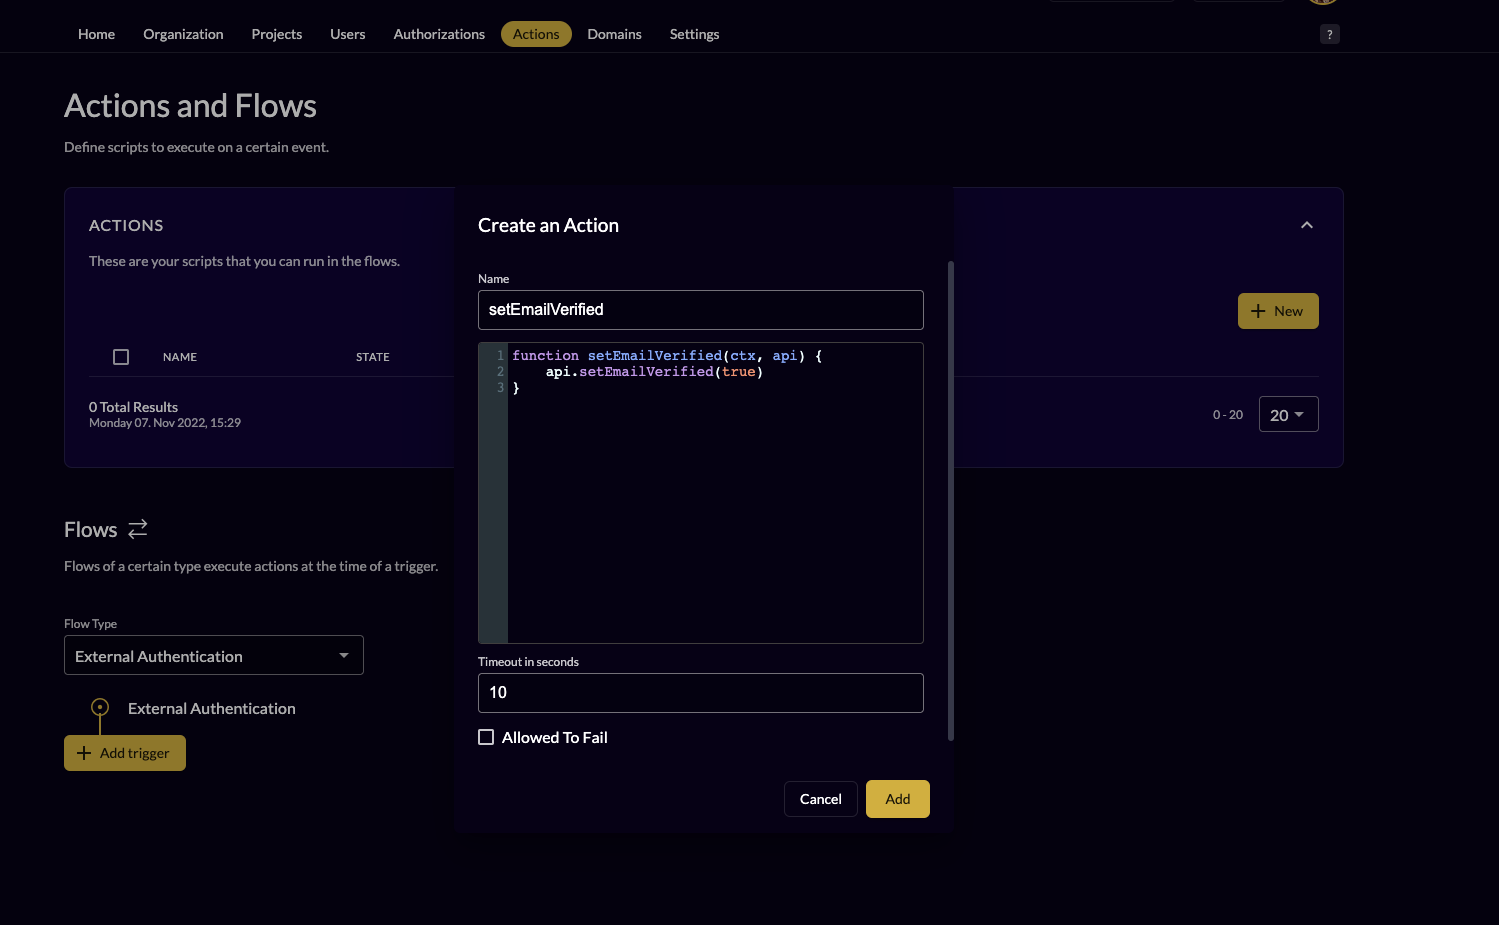
Create user with verified email
Azure AD does not send the "email verified claim" in its token. Due to that the user will get an email verification mail to verify his email address.
To create the user with a verified email address you must add an action.
- Go to the actions of your organization
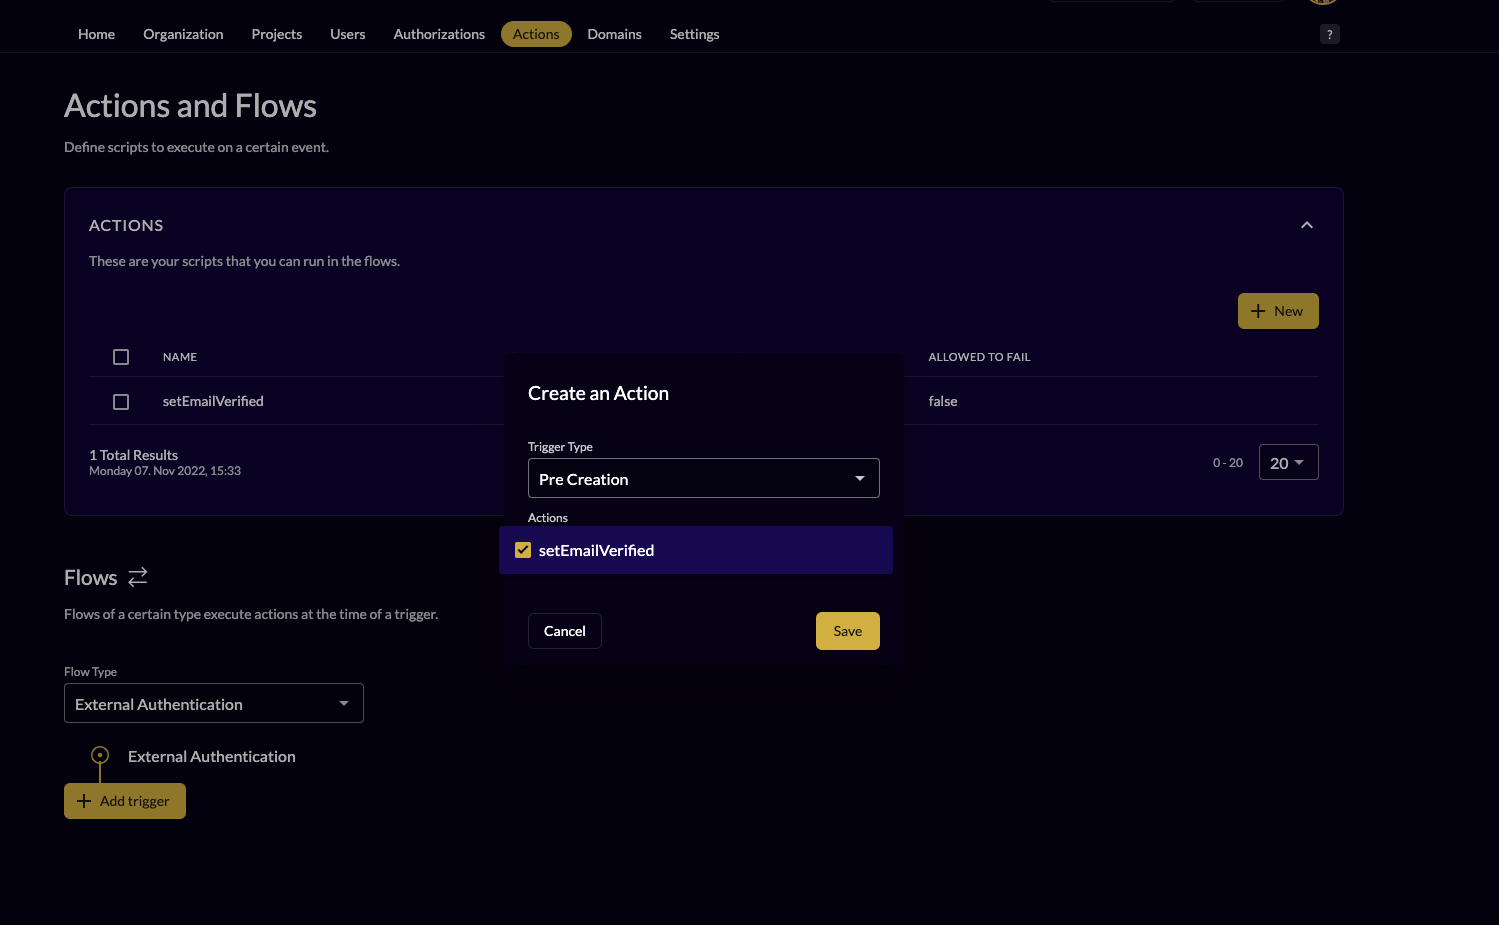
- Create a new action with the following code to set the email to verified automatically
- Make sure the action name matches the function in the action itself e.g: "setEmailVerified"
loading...
- Add the action "email verify" to the flow "external authentication" and to the trigger "pre creation"
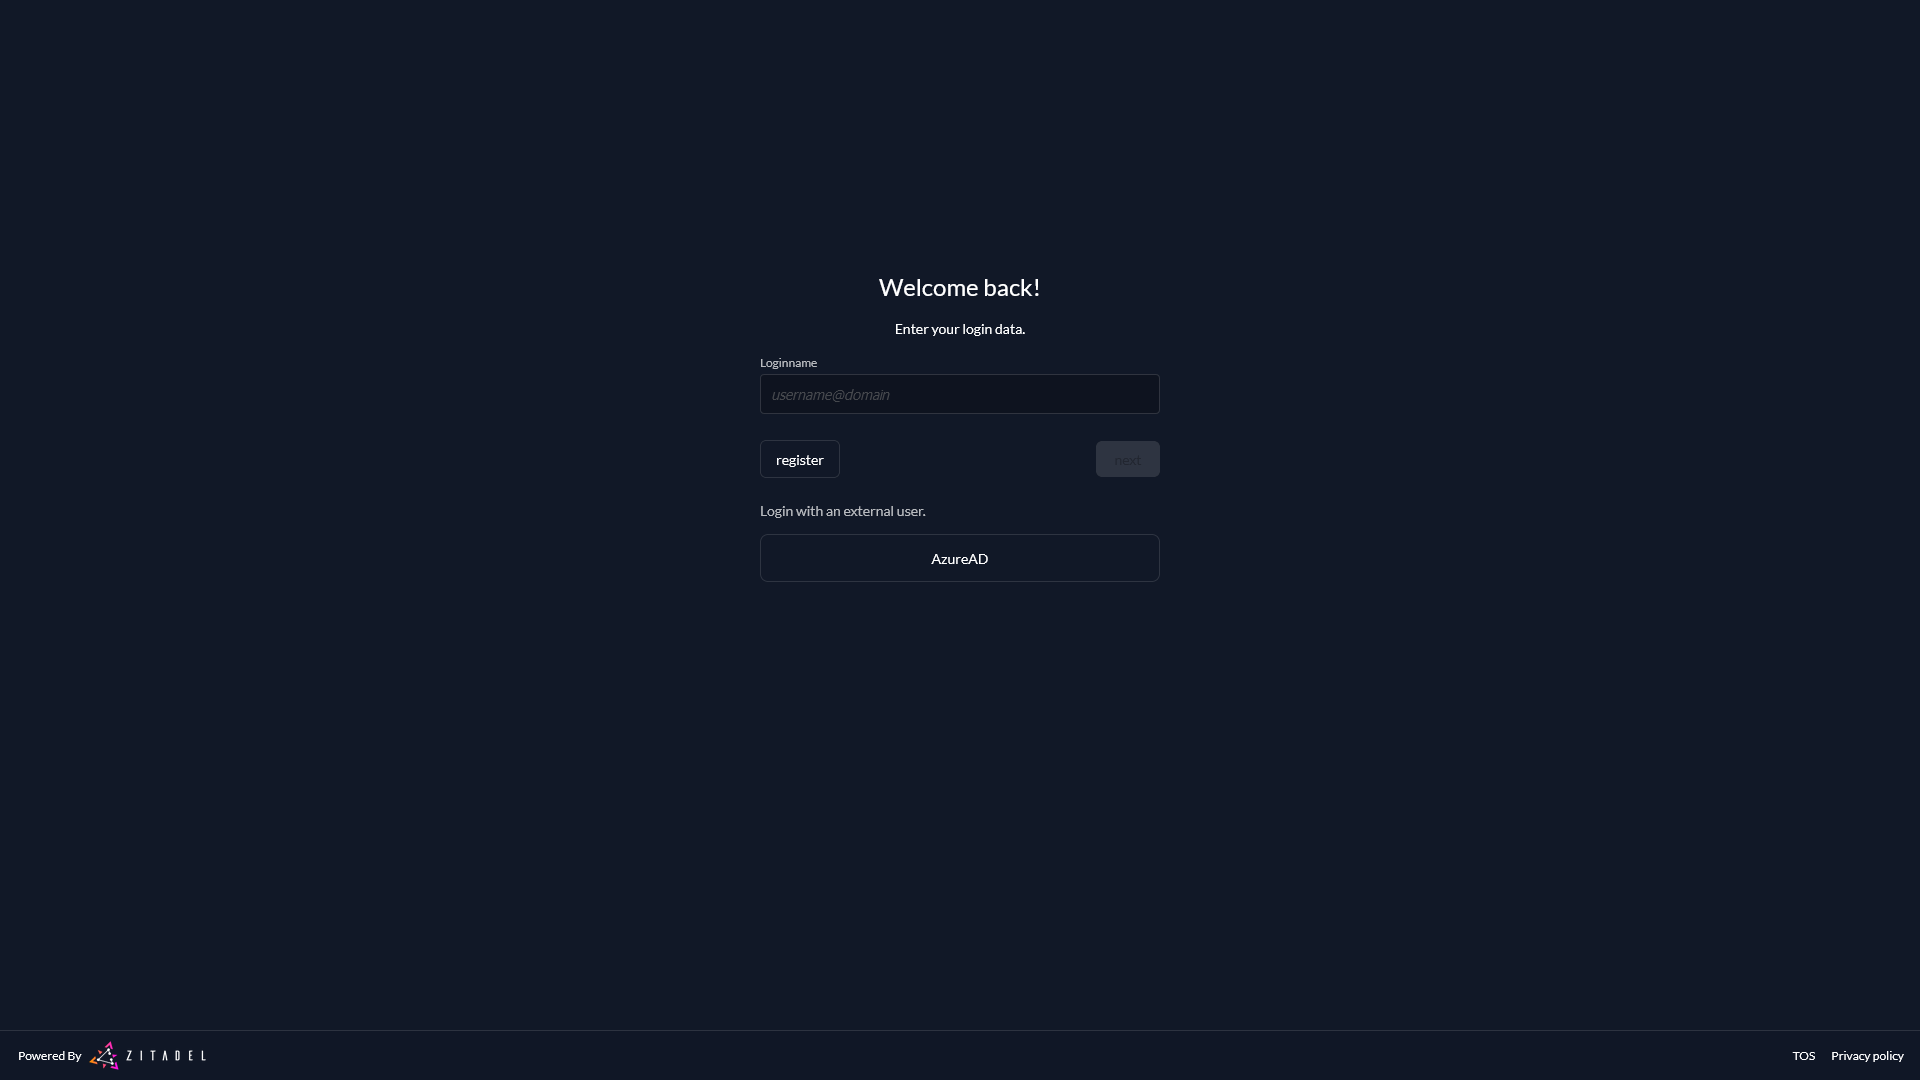
Automatically redirect to Azure AD
If you like to get automatically redirected to your Azure AD login instead of showing the ZITADEL login with the Username/Password and a button "Login with AzureAD" you have to do the following steps:
- Go to the login behaviour settings of your instance or organization
- Disable login with username and password
- Make sure you have only configured AzureAD as external identity provider
- If you did all your settings on the organization level make sure to send the organization scope in your authorization request: scope
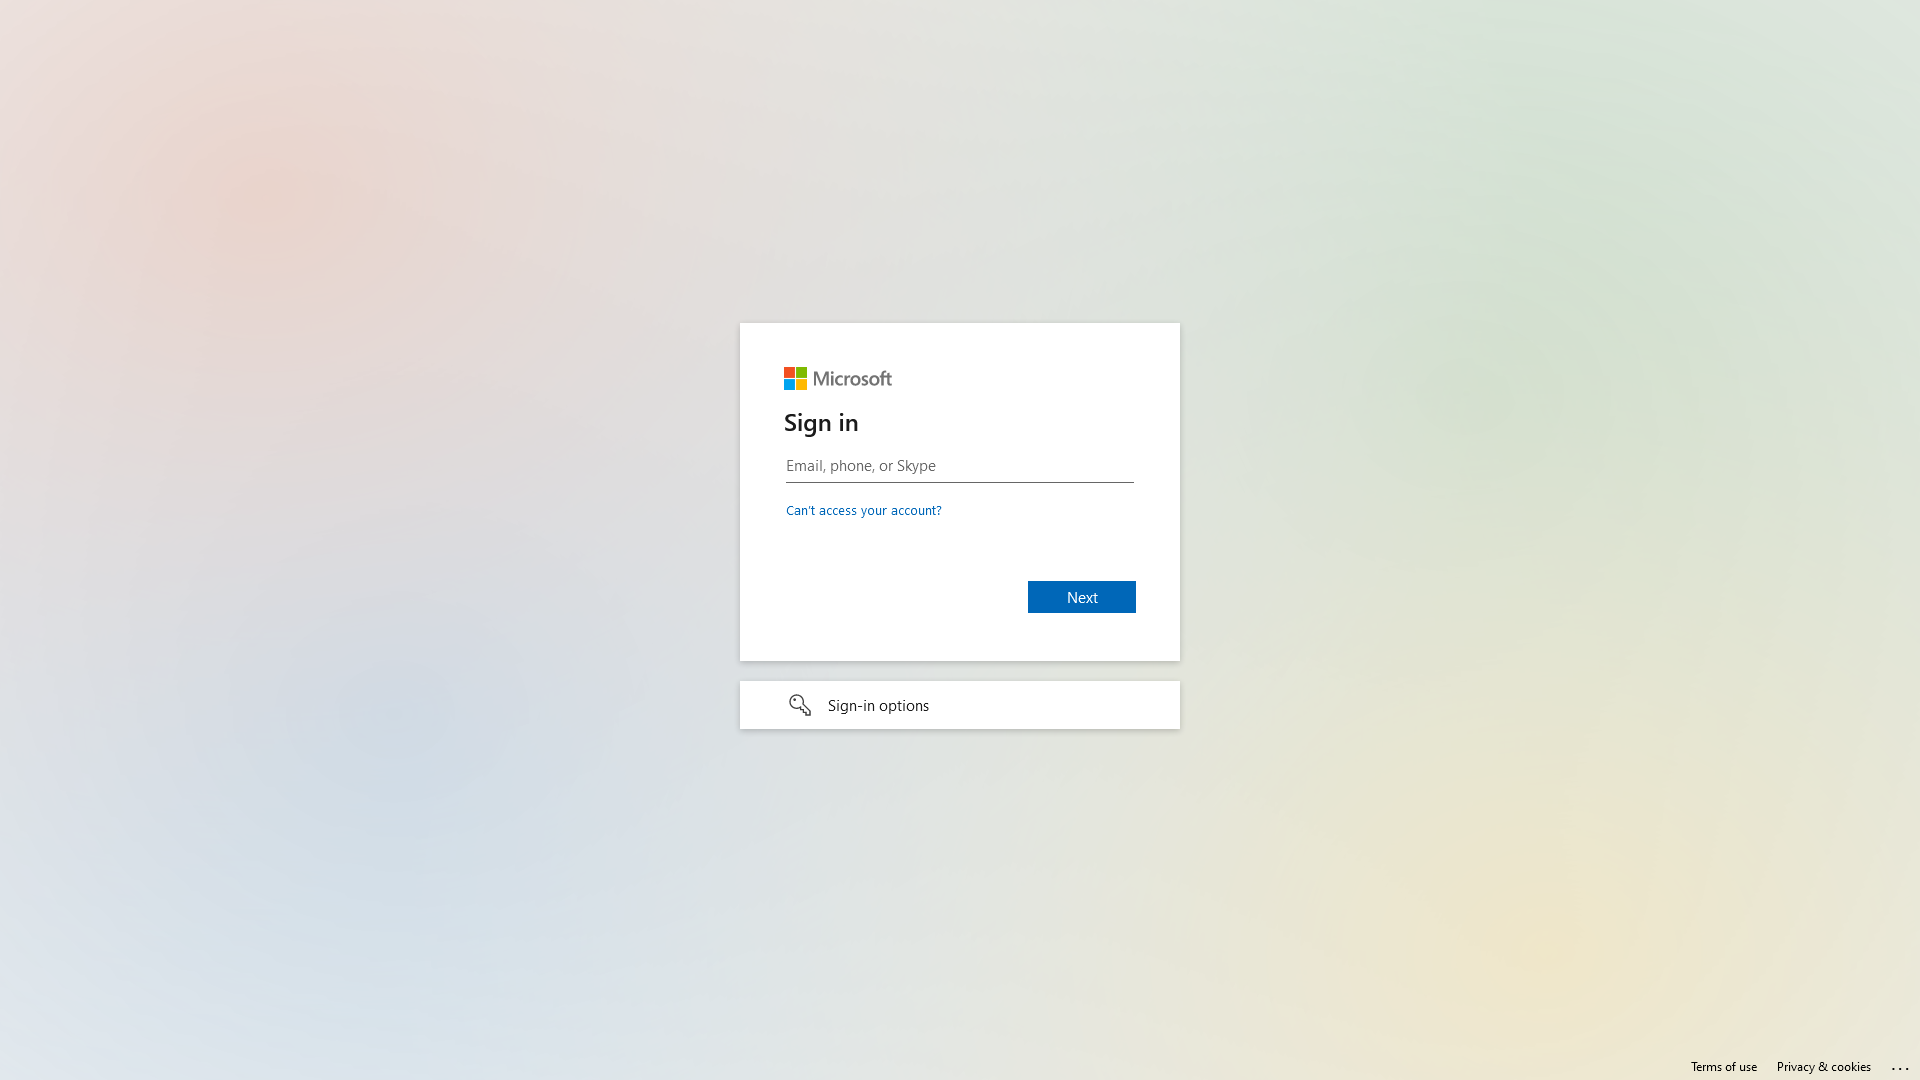
Test the setup
To test the setup use incognito mode and browse to your login page. If you succeeded you should see a new button which should redirect you to your AzureAD Tenant.